- 613-421-0505
- info@atlantistilesandflooring.co

A beautiful new floor can still look uneven, sound hollow, or fail early if the surface beneath it was rushed. Knowing how to prepare a subfloor for installation protects your investment before the first plank, tile, or carpet section goes down. The goal is straightforward: create a subfloor that is clean, dry, flat, sound, and suitable for the flooring material you selected.
Preparation requirements are not identical for every product. Ceramic tile needs a particularly rigid base, hardwood requires careful moisture control, and luxury vinyl can reveal small imperfections that other flooring may hide. Always use your flooring manufacturer’s installation instructions as the final authority, then address the conditions of your specific room.
Remove the existing flooring, underlayment, adhesive residue, baseboards, and transition pieces as needed to expose the full installation area. This is the time to inspect the entire floor, not only the obvious problem spots. A room can appear level at first glance while still having dips, ridges, loose panels, or moisture concerns that affect the finished result.
Most homes have one of two subfloor types. Wood subfloors are commonly plywood or oriented strand board, installed over floor joists. Concrete subfloors are typical on slabs, in basements, and in some multi-unit buildings. Each needs a different repair approach, but both must be stable and dry before flooring installation begins.
Walk slowly across a wood subfloor and listen for squeaks, movement, or soft areas. Look for dark staining, swollen edges, damaged panels, protruding fasteners, and gaps around plumbing penetrations. On concrete, inspect for cracks, spalling, powdery surfaces, old adhesive, and low areas where water may collect.
If you find signs of an active leak, mold, or structural movement, pause the flooring project. New flooring should never cover an unresolved moisture or structural issue. Repairing the source first is less costly than removing a failed floor later.
A common misunderstanding is that a subfloor must be perfectly level. Level matters in certain situations, particularly where drainage or adjoining surfaces are involved, but flooring usually depends more on flatness. A flat surface has no sudden highs and lows that can stress the material or create visible irregularities.
Use a long straightedge, laser level, or a string line to check several directions across the room. Mark high and low spots with a pencil or painter’s tape. Check doorway openings, room perimeters, areas near cabinets, and spots where different flooring surfaces will meet. These are the places where small height differences become especially noticeable.
Manufacturer tolerances vary by material, so do not assume one standard fits every floor. Large-format tile, rigid-core vinyl, laminate, and engineered hardwood each have their own requirements. Review those limits before selecting a patching compound or deciding how much sanding is needed.
On a wood subfloor, minor high spots may be sanded down carefully. Low areas can often be corrected with an approved floor patch or leveling product rated for wood substrates. Do not use ordinary drywall compound or a product that is not designed for flooring loads.
For concrete, grind down high spots and fill low areas with a compatible patch or self-leveling underlayment. Self-leveling products can produce excellent results, but they are not a shortcut for poor preparation. The concrete must be clean, sound, properly primed when required, and sealed against moisture conditions specified by the product manufacturer.
Tile installed over an uneven surface can crack or develop uneven edges between tiles. Floating laminate and vinyl floors may flex, separate at joints, or make clicking sounds over dips. Hardwood can develop movement or visible gaps, while carpet can show ripples and wear unevenly. Correcting the substrate is what gives the finished floor its polished appearance and dependable performance.
A subfloor should feel solid underfoot. If it moves before installation, the new floor will not make that movement disappear.
For wood subfloors, drive appropriate screws into joists where panels squeak or lift. Avoid fastening blindly into areas with plumbing, wiring, or radiant heating below. Replace sections that are water-damaged, delaminated, mold-affected, or too weak to hold fasteners. If the floor feels bouncy across a wider area, the concern may involve joist spacing or framing rather than the subfloor alone. That is a good point to consult a qualified professional.
Check panel edges for height differences. Plywood or OSB panels that have swollen from moisture may need replacement rather than aggressive sanding. Sanding can weaken the panel, and a swollen edge often signals that moisture has affected more than the visible surface.
Concrete cracks also deserve a closer look. Hairline shrinkage cracks can often be treated with an appropriate crack-isolation or repair system, depending on the flooring type. Wider cracks, vertical displacement, or cracks that continue to expand may indicate slab movement. Tile is especially vulnerable to movement, so a proper uncoupling or crack-isolation strategy may be necessary.
Dust, debris, wax, oil, paint overspray, staples, and old adhesive can interfere with adhesion and create bumps under flooring. Sweep first, then vacuum carefully, including corners, seams, and around vents. Use a scraper to remove loose residue, but avoid damaging the subfloor in the process.
Adhesive removal requires care. Some older flooring materials and mastics may contain hazardous substances. If you are unsure of the age or composition of an existing material, have it assessed before sanding, grinding, or scraping. Safety comes before schedule.
For glue-down flooring, surface cleanliness is especially critical. Adhesives bond to the substrate, not to dust or old residue. Follow the adhesive manufacturer’s directions for approved cleaning methods, primers, and moisture-control products. Using a compatible system helps preserve warranty coverage and reduces the risk of bond failure.
Moisture is one of the most common causes of flooring problems. It can cup hardwood, weaken adhesives, cause vinyl planks to shift, encourage mold growth, and damage laminate cores. A dry-looking floor is not automatically a dry subfloor.
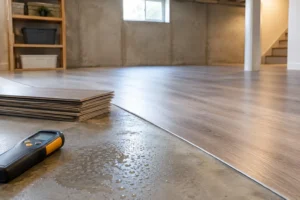
Concrete can retain moisture long after it appears cured, particularly below grade or in spaces with limited ventilation. Wood subfloors can absorb moisture from crawl spaces, plumbing leaks, wet basements, or humidity changes. Use an appropriate moisture test method for the substrate and flooring product. The required test and acceptable reading depend on the installation system, so rely on the manufacturer’s specifications rather than a general rule of thumb.
Address the conditions creating excess moisture before moving forward. That may mean repairing drainage, improving ventilation, installing a vapor retarder, using a moisture-mitigation system, or allowing more drying time. In basements, it may also mean choosing a floor designed for below-grade conditions, such as properly installed luxury vinyl or certain engineered flooring products, rather than solid hardwood.
Acclimate flooring materials as directed once the room’s temperature and humidity are stable. Bringing material into an unfinished, damp, or unheated room does not count as proper acclimation. The subfloor, flooring, and room environment need to be within the recommended range before installation begins.
Preparation also means thinking ahead to the finished floor height. Measure from the subfloor to door bottoms, cabinetry, appliances, stair nosings, and adjoining rooms. Underlayment, tile backer board, membranes, and flooring thickness can change clearances significantly.
A new floor should transition comfortably and safely into nearby rooms. If one material sits higher than another, plan for the correct reducer or transition strip rather than trying to force the surfaces together. Door jambs may need undercutting for a clean fit, and doors may require trimming if the new assembly raises the floor.
Underlayment is not automatically required, and it is not interchangeable across flooring types. Some floating floors include an attached pad, while others require a specific underlayment with moisture or sound-control properties. Tile may need cement backer board or an uncoupling membrane. Hardwood may require a vapor retarder over wood subfloors. Adding the wrong layer can create movement, trap moisture, or void a product warranty.
Small repairs and basic cleaning are manageable for many homeowners. However, professional assessment is valuable when the floor has moisture damage, significant unevenness, structural movement, a concrete slab with unknown conditions, or a complex transition between rooms. Commercial spaces also benefit from a detailed substrate review because heavy traffic leaves little room for preparation errors.
At Atlantis Tiles and Flooring, preparation is treated as part of the installation, not an afterthought. A clear assessment before work begins helps match the right materials and installation method to your room, budget, and performance needs.
Take the time to prepare the surface beneath your flooring with the same care you give to selecting its color and style. The result is a floor that feels solid, looks refined, and is ready to perform for years.